
Thinking about upgrading your clip-on suspenders to a button-on style? You're not alone. Making this shift can give your wardrobe a classic touch and improve the security of your suspenders, but it involves more than just swapping clips for buttons.
Understanding the difference between button suspenders and clip-on styles is the first step toward making an informed decision. You'll need to gather the right materials, decide on the best attachment method for your skill level and preferences, and follow proper installation techniques to ensure durability.
What Materials Do You Need to Convert Clip-On Suspenders?
Successfully converting clip-on suspenders to a button-on style requires gathering several essential materials before you begin. The specific components you'll need depend on which attachment method you choose, but understanding all your options helps you make the best decision for your project. Proper preparation with the right materials ensures a smooth conversion process and a professional-looking result that will last for years.
The foundation of your conversion starts with understanding the two main configuration types: inverted-U connections and inverted-V configurations. Each requires slightly different materials, though both serve the same purpose of securely attaching your suspenders to buttons on your waistband. Taking time to source quality materials from the start will save you frustration later and result in a more durable attachment.

What Are the Essential Components for Button-On Conversion?
For inverted-U connections, you'll need leather loops, which are vital components that replace the clip ends on your suspenders. These leather suspender loops are available online in both black and brown to match your existing suspender color. The leather loops work in conjunction with D-rings to create a secure attachment point that won't slip or come loose during wear.
Metal D-rings are another critical component you can find at most sewing supply stores. These rings hold everything in place and guarantee a sturdy, reliable attachment that can withstand the tension of your suspenders throughout the day. The D-rings should be made from quality metal that won't bend or break under normal use, as they serve as the structural anchor point for your entire conversion.
-
Leather loops: Essential for inverted-U connections, available in black or brown to match your suspenders
-
D-rings: Metal rings from sewing supply stores that secure the leather loops to your suspenders
-
Leather straps: Required for inverted-V configurations, though harder to find than loops
-
Suspender buttons: Specialized buttons designed to withstand the tension of suspenders
-
Thread: Heavy-duty thread that matches your waistband lining color for invisible stitching
For inverted-V configurations, you'll need leather straps instead of loops. These straps can be trickier to find than loops, but leather stores or specialty suspender suppliers are your best sources. The leather straps integrate seamlessly with your original suspenders, creating a traditional look while ensuring secure button attachment that won't fail when you need it most.
What No-Sew Materials Are Available for Conversion?
If you prefer to avoid sewing entirely, several no-sew solutions offer quick and reliable conversion options. MarsSuspenders.com offers clip-on buttons specifically designed for suspender conversion, providing a convenient solution that requires no sewing skills. These clip-on button systems are available in four different colors to match various trouser styles and personal preferences.
Trafalgar Store provides another excellent no-sew option with their clip systems that offer both versatility and reliability. These clips are engineered to hold securely while allowing you to maintain the flexibility of easily switching between different pairs of pants. The beauty of no-sew solutions is that they provide professional results without requiring any alteration to your existing trousers, preserving your wardrobe's versatility.
More connection points in any suspender system provide better stability and weight distribution across your shoulders and back. This is why using button-on braces with properly installed attachments will ensure your suspenders stay in place more securely than clip-on alternatives, regardless of which conversion method you choose.
How Do You Choose the Right Button Attachment Method?
Selecting the appropriate button attachment method depends on several factors, including your sewing skills, time constraints, and how permanently you want to modify your trousers. Each method offers distinct advantages and considerations that make it suitable for different situations and preferences. Understanding these options helps you choose the approach that best aligns with your needs and abilities.
The decision between sewing and no-sew methods fundamentally comes down to permanence versus flexibility. Sewn buttons provide the most traditional, secure attachment and create a truly authentic button-on suspender experience. However, they require basic sewing skills and permanently modify your trousers. No-sew alternatives offer convenience and reversibility but may not provide quite the same level of security or traditional aesthetic appeal.
What Are the Benefits of Sewn Button Attachments?
Sew-on buttons offer the most secure and traditional look for your suspender conversion, creating an authentic button-on experience that mirrors how suspenders were originally designed to be worn. This method requires just basic sewing skills but delivers results that can last for decades with proper installation. The permanent nature of sewn buttons means you won't have to worry about attachments coming loose or needing periodic adjustment.
Traditional sew-on buttons typically come with 2-4 holes, which ensures a secure attachment when converting your suspenders. The multiple holes allow you to create reinforced stitching patterns that distribute tension evenly across the button and waistband. When you're attaching suspender buttons to your clothing, this distribution of force prevents stress points that could cause the fabric to tear or the button to pull free.
-
Permanence: Once sewn, buttons stay in place indefinitely without maintenance
-
Security: Properly sewn buttons provide the strongest possible attachment
-
Traditional aesthetic: Creates an authentic vintage suspender look
-
Cost-effective: One-time installation with no need for replacement parts
-
Customization: Allows precise placement for optimal fit and comfort
The key to successful sewn button installation lies in proper placement and reinforcement techniques. Using strong thread that matches your waistband lining color keeps stitches virtually invisible from the outside, while reinforcing the attachment area with interfacing or fabric patches prevents tearing on delicate fabrics. This attention to detail ensures your conversion looks professional and lasts as long as the trousers themselves.
When Should You Consider No-Sew Button Options?
No-sew button options excel when you need flexibility, want to avoid permanent modifications, or lack sewing skills. These solutions allow you to quickly convert clip-on suspenders to button-style without altering your trousers in any permanent way. This reversibility is particularly valuable if you wear different styles of suspenders with the same trousers or want to maintain your pants' resale value.
Clip-on button systems and snap-on alternatives provide quick attachment without requiring any tools or sewing knowledge. These systems work by clamping onto your waistband, creating a temporary but secure button point that your suspender loops can attach to. The installation process takes just seconds, making them ideal for people who frequently switch between different suspender styles or want to convert multiple pairs of pants without the time investment of sewing buttons on each pair.
Most no-sew systems are designed to fit all standard pant sizes and styles, eliminating the need for customization or fitting adjustments. The universal design means you can transfer the same set of no-sew buttons between different trousers as needed, maximizing your investment and providing unmatched versatility in your wardrobe rotation.
What Techniques Should You Use for Sewing Buttons?
Mastering proper sewing techniques ensures your button conversion is secure, durable, and professional-looking. The specific approach you take depends on the type of button you're using, but all methods share common principles of reinforcement, proper thread selection, and careful execution. Taking time to learn correct techniques prevents frustration and ensures your suspenders stay securely attached through years of regular wear.

Different button styles require slightly different sewing approaches to maximize their security and longevity. Flat buttons with either two or four holes need different stitching patterns, while shank buttons require their own unique installation method. Understanding these differences helps you choose the right button type for your needs and execute the installation flawlessly.
How Do You Attach Flat Two-Hole Buttons?
For flat two-hole buttons, the process begins with threading your needle with double-thickness thread for maximum strength. This doubled thread provides significantly more durability than a single strand and better distributes the tension that suspenders create. Always use thread that matches your waistband lining color to keep stitches hidden and maintain a professional appearance.
Start by creating an "X" anchor on the fabric where you'll attach the button. This anchor provides a foundation that prevents the button from pulling through the fabric over time. Position the button over your anchor point, then stitch through both holes 3-5 times to ensure adequate security. Each pass through the holes should be pulled snug but not so tight that it puckers the fabric or stresses the thread.
-
Thread preparation: Double your thread and tie a secure knot at the end
-
Anchor creation: Make an "X" pattern on the fabric for foundation support
-
Button positioning: Align button precisely where suspender attachment will occur
-
Multiple passes: Stitch through holes 3-5 times for optimal security
-
Stem wrapping: Wrap thread around button stem after final pass
-
Secure knotting: Tie off with multiple knots on the underside
After completing your final pass through the button holes, wrap the thread around the stem (the thread bridge between button and fabric) several times. This wrapping creates a shank that gives your button loops room to sit comfortably without excessive tension. Finish by securing everything with a tight knot on the underside of the waistband, ensuring no thread ends are visible from the outside.
What's the Process for Four-Hole Buttons?
Four-hole buttons provide extra security through dual stitching paths, making them an excellent choice for suspender conversions where durability is paramount. The additional holes allow you to create two separate thread paths that share the load, significantly reducing the risk of failure. This makes four-hole buttons particularly suitable for heavy-duty suspenders or situations where you need maximum reliability.
Begin by marking your button placement carefully with chalk or a fabric pencil. Accuracy in placement is crucial because button position affects both comfort and how your suspenders hang. Once marked, sew through one set of diagonal holes 3-5 times, maintaining consistent tension throughout. After completing the first set, repeat the process with the opposite diagonal pair of holes.
Using a toothpick or similar object as a spacer while sewing creates a thread shank automatically. Place the toothpick on top of the button before you begin stitching, then sew over it. When you remove the toothpick after completing all your stitching passes, you'll have a perfect shank that provides proper clearance for your suspender loops. Secure everything with a double knot on the underside for maximum durability.
How Do Shank Buttons Work for Suspenders?
Shank buttons feature a built-in loop on the back rather than holes through the button face, offering a cleaner look and simplified installation process. The shank design is particularly well-suited for suspender applications because it provides natural clearance for suspender loops without requiring you to create a thread shank manually. This makes them faster to install while maintaining excellent security.
To install shank buttons, thread your needle through the shank loop and begin stitching directly into your waistband. The self-contained loop eliminates the need for creating thread bridges or spacing mechanisms. Simply stitch through the shank and fabric repeatedly, typically 4-6 times, ensuring each pass is secure and tight. After your final pass, reinforce the attachment by wrapping thread around the base of the shank several times.
The key advantage of shank buttons for suspender conversion is their durability and ease of use. Because the button itself contains the attachment loop, there's no risk of thread shanks wearing through or breaking down over time. This makes shank buttons an excellent long-term solution, though they may be slightly more expensive than traditional flat buttons with holes.
How Do You Install Hammer-On Buttons?
Hammer-on buttons provide a permanent, professional-quality installation that rivals sewn buttons in security while requiring less time and different skills. This method uses mechanical force to attach buttons rather than thread, creating a rivet-like connection that's extremely durable. For those intimidated by sewing or wanting a faster installation process, hammer-on buttons offer an attractive alternative that delivers excellent long-term results.

The installation process requires specific tools and a methodical approach, but the actual installation of each button takes just seconds once you've prepared your materials and workspace. This speed, combined with the permanence of the attachment, makes hammer-on buttons increasingly popular for suspender conversions. Understanding proper technique ensures your buttons are installed securely without damaging your trousers.
What Tools and Materials Do You Need for Hammer-On Installation?
Gathering the right tools before you begin is essential for successful hammer-on button installation. You'll need a hammer (a regular carpenter's hammer works fine), a small anvil or other hard, flat surface to work against, and an awl or hole punch to create openings in your waistband. The setting tools typically come with hammer-on button kits and are specifically designed to work with that button style.
Stabilizing the fabric with interfacing before installation prevents tearing and ensures your buttons stay secure through years of use. This reinforcement is particularly important on thinner or more delicate trouser fabrics that might not withstand the stress of suspender tension on their own. Apply the interfacing to the area where you'll install buttons before you begin marking or punching holes.
-
Hammer: Standard carpenter's hammer for driving buttons into place
-
Anvil or hard surface: Provides backing support during installation
-
Awl or hole punch: Creates precise openings for button posts
-
Setting tools: Specialized tools included with button kits for proper installation
-
Interfacing: Fabric reinforcement to prevent tearing
-
Marking tools: Chalk or fabric pencil for accurate button placement
Proper button placement on your pants is crucial for both comfort and functionality. Mark your button locations carefully, aligning them with your suspender ends to ensure even weight distribution. Most suspenders work best with buttons positioned approximately 1-1.5 inches from the center seam on the front and 3-4 inches apart on the back waistband.
What's the Step-by-Step Process for Hammer-On Installation?
Begin by using your awl to poke holes from the back of the waistband outward. This direction ensures clean holes on the visible side of your fabric while any irregularities remain hidden on the inside. Make sure all posts penetrate fully through both layers of your waistband if it's constructed with a lining. Incomplete penetration will result in weak attachment that can fail under stress.
Push each button post through from the back of the waistband, ensuring it emerges cleanly on the front side. Place the decorative cap over the post on the front side of the fabric, making sure it's seated flush against the fabric surface. Any gaps between the cap and fabric will reduce the security of your installation and may cause the button to work loose over time.
Position your setting tool over the button cap, ensuring it's properly aligned with the post below. Strike the setting tool firmly with your hammer, using multiple taps rather than one heavy blow. This gradual approach gives you better control and reduces the risk of damaging the fabric or button. After installation, feel the button to ensure it's level and secure, with no wobbling or loose movement. Test each button by gently pulling on it before attaching your suspenders.
What Are the Best No-Sew Alternatives?
No-sew alternatives have evolved significantly in recent years, offering solutions that rival sewn buttons in both security and professional appearance. These systems appeal to people who want the functionality of button-on suspenders without permanently modifying their trousers or investing time in learning sewing techniques. Modern no-sew solutions provide durability, ease of use, and versatility that make them legitimate alternatives rather than inferior substitutes.
The key advantage of no-sew systems is their reversibility and flexibility. You can install them in minutes, remove them just as quickly, and transfer them between different pairs of pants without any lasting impact on your wardrobe. This makes them ideal for people who wear suspenders occasionally, those building a suspender collection, or anyone who values the option to switch back to belts when desired.
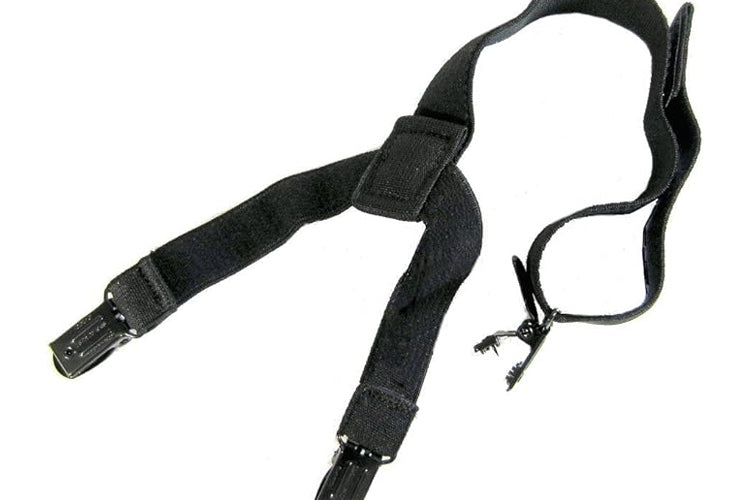
How Do Clip-On Button Systems Work?
Modern clip-on button systems feature durable metal construction that provides long-lasting performance without the potential for fabric damage that early clip designs sometimes caused. The one-size-fits-all design eliminates the need for customization or fitting adjustments, making installation foolproof even for first-time users. These systems work with all standard suspender button loops, ensuring compatibility with any button-on suspenders you own or plan to purchase.
The clamp mechanism that secures these systems to your waistband is engineered to hold firmly without damaging fabric fibers. Unlike older clip designs that might crush or tear delicate materials, modern systems distribute pressure evenly across a wider surface area. This gentle-but-secure grip means you can use clip-on button systems even with fine dress trousers without worry about long-term damage or visible marks.
-
Metal construction: Provides durability comparable to permanent button installations
-
Universal sizing: Works with all standard pants without adjustment
-
Fabric-safe clamping: Holds securely without damaging material
-
Quick installation: Takes seconds to open, position, and snap closed
-
No tools required: Install and remove with your hands alone
-
Transferable: Move between pants without leaving marks or damage
Installation couldn't be simpler: open the clip, slide it over your waistband at the desired position, and snap it shut. The entire process takes just seconds per button, meaning you can fully convert a pair of pants for button-on suspenders in under a minute. When you want to remove them, simply open the clip and slide it off,no residue, no marks, no damage to your trousers.
What Finish Options Are Available?
No-sew button systems come in multiple finish options to complement different trouser styles and personal aesthetic preferences. Common finishes include classic black, brushed silver, and antique brass, each offering a distinct look that can coordinate with your belt buckle, shoes, or other accessories. Choosing the right finish ensures your suspender buttons integrate seamlessly with your overall outfit rather than appearing as an afterthought.
Black finishes provide a versatile, understated look that works with virtually any trouser color and style. They're particularly effective with dark or formal trousers where you want the suspenders themselves to be the focal point rather than the buttons. Brushed silver offers a more contemporary, polished appearance that pairs beautifully with gray, charcoal, or navy trousers and coordinates well with silver watch bands or belt buckles.
Antique brass finishes deliver vintage character that's perfect for brown, tan, or earth-tone trousers. This warm metallic tone complements leather accessories beautifully and creates a cohesive traditional look. At approximately $24.99 per set, no-sew button systems represent a cost-effective alternative to expensive tailor services, especially considering you can use the same set with multiple pairs of pants throughout your wardrobe.
How Do Convertible Suspender Systems Work?
Convertible suspender systems represent the ultimate in flexibility, allowing you to switch between clip-on and button-on styles without any tools or modification to your suspenders. These innovative designs recognize that different occasions call for different attachment methods,button-on for formal events where traditional appearance matters, and clip-on for casual situations where convenience takes priority. Understanding how convertible systems work helps you maximize their versatility.
The core innovation in convertible systems lies in their snap-based designs that enable quick attachment changes. Rather than permanently committing to either clips or buttons, you can adapt your suspenders to whatever situation arises. This versatility proves particularly valuable if you're building a suspender wardrobe and want to try different styles before settling on a preference, or if you simply want options available for different occasions.
What Makes Snap-Based Designs So Versatile?
Snap-based designs allow you to quickly switch between clip and button styles by simply opening the snap mechanism and swapping attachment types. This process requires no tools and takes just seconds per attachment point, making it practical even when you're in a hurry. The snap, knob, or pin mechanisms that hold attachments in place are engineered to be secure during wear but easy to open when you want to make changes.
Premium convertible models go beyond simple clip-and-button options, offering versatile choices like trigger snaps for extra security, leather button-on attachments for traditional formal wear, and heavy-duty alligator clips for work suspenders. This range of options means one pair of convertible suspenders can serve in virtually any situation, from black-tie events to construction sites, simply by changing the attachment type.
How Durable Are Convertible Suspender Systems?
Convertible suspenders are crafted from premium materials like tweed, leather, or high-denier nylon specifically chosen for their durability and ability to withstand frequent attachment changes. These materials resist wear at the snap points where other suspender designs might develop weakness over time. The investment in quality materials ensures that convertible systems last just as long as traditional dedicated clip-on or button-on suspenders, despite their additional complexity.
Reinforced stitching at all stress points provides extra durability precisely where it's needed most. The areas around snap mechanisms, adjustment slides, and attachment points receive multiple passes of heavy-duty thread, often in cross-hatch or box patterns that distribute stress effectively. This reinforcement prevents the tearing or separation that can occur with lower-quality suspenders when subjected to regular use and frequent attachment changes.
-
Premium materials: Tweed, leather, or high-denier nylon for long-term durability
-
Reinforced stitching: Multiple thread passes at all stress points
-
Weather-resistant properties: Materials that withstand various conditions
-
Metal snap mechanisms: Corrosion-resistant hardware that maintains grip strength
-
Tested durability: Designed to handle frequent attachment changes
Weather-resistant properties in quality convertible suspenders keep you ready for any conditions, whether you're caught in unexpected rain or working in humid environments. The elastic components maintain their stretch and recovery properties across wide temperature ranges, while metal parts resist corrosion even with exposure to moisture or salt. This all-weather durability makes convertible suspenders practical for year-round use in any climate.
How Easy Is It to Change Between Attachment Types?
Changing attachments on convertible suspenders is remarkably straightforward, designed to be accomplished quickly even without instructions. Simply open the snap or release mechanism at each attachment point, remove the current attachment, and insert the desired replacement. The positive-click design of quality snap mechanisms provides tactile and audible confirmation when the new attachment is properly seated and secure.
Most people can complete a full conversion from clip to button style (or vice versa) in under two minutes once they're familiar with the mechanism. This speed makes it practical to change attachment types daily if desired, selecting button-ons for professional settings and clips for casual weekend wear. The convenience factor eliminates any excuse for not wearing suspenders in situations where they'd be beneficial but one style might not be appropriate.
Frequently Asked Questions About Converting Suspenders
Can You Convert Suspenders Without Damaging Your Pants?
Yes, you can convert suspenders without damaging your pants by using no-sew alternatives like movable clips or hammer-on buttons with proper reinforcement. The key to avoiding damage lies in using fabric-safe materials and proper installation techniques that distribute stress evenly across the waistband rather than concentrating it at single points.
Can You Switch Between Clip-On and Button-On Easily?
Yes, switching between clip-on and button-on suspenders is extremely easy with convertible systems or when using no-sew button alternatives. Simply swap the attachments by unsnapping or removing clips from your suspenders, then attach the button loops in their place. The quick-release mechanisms in quality suspenders make this process take just seconds per attachment point.
Where Can You Find High-Quality Leather Loops?
You'll find high-quality leather loops from specialized suspender suppliers like Wiseguy Suspenders, Col. Littleton, and Hide & Drink. These companies offer durable, handcrafted options with various attachment kits designed specifically for suspender conversions. Their products typically come in multiple leather types, colors, and styles to match different suspender aesthetics and personal preferences.
What Thread Should You Use for Sewing Buttons?
Always use heavy-duty thread specifically designed for buttons and high-stress applications when sewing suspender buttons. Standard all-purpose thread may not withstand the constant tension that suspenders create, leading to premature failure. Button thread is typically thicker and stronger than regular sewing thread, with construction that resists abrasion and breaking under stress.
How Long Does Button Conversion Take?
The time required for button conversion varies significantly based on your chosen method and skill level. Sewn buttons typically take 5-10 minutes per button for someone with basic sewing skills, meaning a complete four-button installation (two front, two back) requires 20-40 minutes. This includes time for marking positions, threading needles, and securing knots properly.
Are Convertible Suspenders as Durable as Dedicated Styles?
Yes, quality convertible suspenders are just as durable as dedicated clip-on or button-on styles when manufactured with proper materials and construction techniques. The key difference lies in the complexity of the mechanism rather than the strength of the materials. Premium convertible suspenders use reinforced snap points and heavy-duty elastic that's rated for the stress of regular attachment changes.
Conclusion
You've successfully learned how to transform your clip-on suspenders into a stylish button-on pair that delivers both classic aesthetics and improved security. By gathering the right materials and choosing your preferred installation method,whether sewn buttons, hammer-on options, or convenient no-sew alternatives,you've gained control over your suspender style and functionality. Each approach offers distinct advantages based on your skills, time availability, and desire for permanent versus reversible modifications.